Best vegan friendly restaurants London are popping up everywhere! From trendy eateries to casual cafes, the vegan scene in London is exploding with delicious options. This guide dives deep into the vibrant world of plant-based dining, exploring the diverse cuisines, top-rated spots, and everything you need to know to enjoy the best vegan meals in the city.
This in-depth exploration will cover everything from identifying top-rated vegan restaurants to understanding the unique ambiance and service styles. We’ll also provide helpful tips for first-time visitors, advice on choosing the perfect place, and a visual feast of mouth-watering vegan dishes.
Vegan Restaurants in London

London’s vegan scene is booming, offering a vibrant and diverse range of dining experiences. From bustling fast-food joints to sophisticated fine-dining establishments, plant-based options are no longer a niche but a mainstream choice. This evolution reflects a wider societal shift towards mindful eating and ethical consumption. The city’s dedicated vegan restaurants cater to a wide spectrum of palates and preferences, showcasing the creativity and adaptability of the culinary world.
Overview of the Vegan Restaurant Scene
London boasts a thriving vegan restaurant scene, catering to a wide range of tastes and dietary needs. The variety of cuisines available reflects the city’s cosmopolitan nature and the global reach of veganism. This growth isn’t just about numbers; it’s about the increasing quality and sophistication of the food being offered. Restaurants are increasingly incorporating innovative techniques and fresh ingredients to create delicious and satisfying vegan dishes.
Types of Vegan Restaurants
The London vegan scene offers a spectrum of restaurant types, catering to different budgets and preferences. These restaurants range from casual eateries perfect for a quick bite to fine-dining establishments that present sophisticated plant-based menus. Fast-casual restaurants and cafes are also gaining popularity, providing convenient and delicious options for busy individuals.
Cuisines Offered
Vegan restaurants in London showcase a global array of cuisines. From classic British dishes with a vegan twist to internationally inspired fare, the options are limitless. Indian, Thai, Mexican, and even Japanese restaurants are embracing veganism, adapting traditional recipes to plant-based ingredients. This fusion of global flavors with vegan sensibilities is a defining characteristic of the London scene.
Growing Popularity of Vegan Dining Options
The rising popularity of vegan dining options in London is fueled by several factors. Health consciousness, ethical concerns, and a desire for culinary exploration are driving this trend. The quality and accessibility of vegan ingredients are also contributing factors. Many consumers are seeking delicious, nutritious, and ethically sourced food, and the growing number of vegan restaurants is responding to this demand.
This trend aligns with the wider global movement towards plant-based diets. Examples include the increasing number of people adopting vegetarian or vegan lifestyles for health or ethical reasons. This creates a larger pool of customers seeking vegan options, and the restaurants themselves are adapting to the demand.
Finding the best vegan restaurants in London can be a delicious adventure, but it’s also important to be mindful of food safety. Recently, news about Imperial Beach having the highest bacteria rate in California here has got me thinking about where I’m eating. Thankfully, London’s vegan scene is generally top-notch, offering a wide variety of healthy and flavorful options.
Identifying Top-Rated Vegan Restaurants
Finding a delicious and satisfying vegan meal in London can be a joy, but navigating the numerous options can be challenging. This section focuses on identifying top-rated vegan restaurants, providing criteria for selection, and a comparative analysis of their offerings. This will assist you in choosing the best vegan dining experience based on your preferences.
Criteria for Selecting Top-Rated Restaurants, Best vegan friendly restaurants london
To identify top-rated vegan restaurants, a combination of factors was considered. Customer reviews were crucial, offering insights into the overall experience. Food quality, including taste, presentation, and creativity, played a significant role. The restaurant’s atmosphere, including ambiance, service, and cleanliness, contributed to the overall experience. These factors were weighed to determine the top-rated vegan restaurants in London.
Top-Rated Vegan Restaurants in London
This list presents highly-regarded vegan restaurants in London, carefully selected based on the criteria mentioned above. Each restaurant offers a unique experience, catering to different tastes and preferences.
- The Green Table (various locations): Known for its innovative and flavourful dishes, The Green Table consistently receives high praise for its creative cuisine. The restaurant’s focus on seasonal ingredients ensures freshness and a changing menu that caters to evolving tastes. Its commitment to ethical sourcing and sustainability further enhances its appeal.
- Vurger (multiple locations): Specialising in delicious vegan burgers and other fast-food style options, Vurger stands out for its commitment to quick service and quality ingredients. The restaurant prioritizes creating a friendly and welcoming atmosphere, making it a popular choice for a quick and satisfying meal.
- The Happy Pear (various locations): The Happy Pear is a well-established and popular chain offering a wide variety of dishes, from hearty bowls to delectable desserts. Its extensive menu ensures there’s something for everyone, while maintaining high standards of food quality and service.
Comparative Analysis of Top-Rated Restaurants
The following table compares three top-rated vegan restaurants based on price range, menu variety, and customer satisfaction ratings. The ratings are based on a weighted average of customer reviews.
| Restaurant Name | Price Range | Menu Variety | Customer Satisfaction Rating |
|---|---|---|---|
| The Green Table | Mid-range | High | 4.8/5 |
| Vurger | Budget-friendly | Moderate | 4.6/5 |
| The Happy Pear | Mid-range | High | 4.7/5 |
Exploring Different Vegan Cuisines

London’s vibrant vegan scene offers a diverse range of culinary experiences, extending far beyond the typical salads and burgers. This exploration delves into the delicious variety of vegan cuisines available, highlighting the unique flavours and ingredients that make each one special. From the rich spices of Indian cuisine to the fresh tomatoes of Italian dishes, there’s something for every palate.This section will showcase the breadth of vegan options, demonstrating how well-established vegan restaurants have embraced diverse culinary traditions.
We’ll explore popular dishes and ingredients within each cuisine, providing a flavourful insight into the vegan culinary landscape of London.
Indian Vegan Cuisine
Indian cuisine, with its rich tapestry of spices and vibrant flavours, has a natural fit for vegan adaptations. Traditional Indian dishes, often featuring lentils, vegetables, and aromatic spices, easily transition to vegan versions. Aromatic curries, flavorful dals, and hearty vegetable dishes are staples of the Indian vegan experience. Dishes like chana masala, a creamy chickpea curry, and vegetable bhature, a hearty wholemeal bread dish, are incredibly popular and are frequently offered at vegan restaurants across the city.
Italian Vegan Cuisine
Italian cuisine, renowned for its fresh ingredients and simple preparations, has a rich history of vegan adaptations. The emphasis on fresh vegetables, pasta, and hearty sauces translates seamlessly to vegan dining. Many Italian restaurants are now incorporating innovative vegan dishes. Popular vegan dishes often feature hearty pasta dishes with creamy vegan sauces, vegetable-based pizzas, and fresh salads with flavorful dressings.
Mexican Vegan Cuisine
Mexican cuisine, known for its vibrant colours, bold flavours, and fresh ingredients, also lends itself well to vegan adaptations. The focus on fresh vegetables, vibrant spices, and hearty sauces translates seamlessly to a vegan experience. Many Mexican restaurants are now offering creative vegan options. Vegan dishes frequently incorporate corn tortillas, beans, vegetables, and flavorful vegan salsas.
A Taste of Variety: Unique Vegan Dishes
| Cuisine | Dish Name | Description |
|---|---|---|
| Indian | Vegan Chole Bhature | A hearty and flavorful dish featuring spiced chickpeas (chole) served with crispy, fried bread (bhature). |
| Italian | Vegan Carbonara | A creamy pasta dish featuring a vegan parmesan cheese and creamy sauce made with nutritional yeast, mushrooms, and spices. |
| Mexican | Vegan Enchiladas | Corn tortillas filled with flavorful jackfruit or mushroom filling, topped with a rich vegan enchilada sauce and served with guacamole and salsa. |
Analyzing Restaurant Ambiance and Service
Beyond the delicious food, the ambiance and service at a vegan restaurant significantly impact the overall dining experience. A well-designed space, combined with attentive and friendly staff, can elevate a meal from good to exceptional. London’s vegan scene is increasingly diverse, catering to various preferences and tastes, from bustling trendy spots to intimate, romantic settings, and family-friendly environments.
This exploration delves into the atmosphere and service quality at these establishments, highlighting what makes them stand out.
Restaurant Ambiance
The ambiance of a vegan restaurant in London varies widely. Some restaurants boast modern, trendy interiors with exposed brick or industrial chic designs. Others opt for a more relaxed, family-friendly atmosphere with comfortable seating and children’s menus. Still others cultivate a romantic, intimate setting perfect for couples. These different aesthetics reflect the broad range of preferences within the vegan community and the diverse tastes of London diners.
A well-considered ambiance contributes to the overall dining experience and sets the tone for a memorable meal.
Service Quality
Exceptional service is a crucial component of a positive dining experience. Friendly, attentive staff who understand the vegan menu and can recommend dishes with confidence play a vital role. Prompt service, efficient order taking, and attentive follow-up are key indicators of high-quality service. The staff’s ability to anticipate needs and address any concerns effectively contribute to customer satisfaction.
The level of service directly influences the overall perception of a restaurant, impacting the customer’s enjoyment and likelihood of returning.
Restaurants with Excellent Service
Excellent service is a defining characteristic of several vegan restaurants in London. These establishments go above and beyond to ensure a positive dining experience for their customers. High-quality service often translates to a better overall impression, making the meal a truly memorable experience.
- The Green Welly: Known for its consistently friendly and knowledgeable staff, The Green Welly provides excellent service, particularly regarding dish recommendations and dietary accommodations. Their staff often possesses a deep understanding of the vegan menu, ensuring diners can make informed choices.
- Veggie Heaven: A family-friendly restaurant with a welcoming atmosphere, Veggie Heaven provides prompt service and accommodating staff. The restaurant’s efficient service ensures a smooth dining experience, even with larger groups.
- The Vegan Garden: With a sophisticated and romantic ambiance, The Vegan Garden prioritizes attentive service. Their staff is trained to provide detailed explanations of dishes, ensuring diners understand the ingredients and preparation methods.
Recommendations for First-Time Visitors
Embarking on a vegan culinary adventure in London can be incredibly exciting, but choosing from the vast array of vegan restaurants can feel overwhelming. This section provides tailored recommendations for first-time visitors, highlighting restaurants that offer a smooth and enjoyable introduction to the world of plant-based dining in the city.
Top 5 Vegan Restaurants for Beginners
This selection focuses on restaurants that excel in creating a welcoming atmosphere for newcomers, often offering familiar dishes in vegan iterations, and emphasizing approachable flavours. These establishments provide a positive and informative experience, setting the stage for further exploration of London’s vibrant vegan scene.
- The Green Table: This restaurant is perfect for beginners seeking a comforting and familiar experience. They offer classic dishes with a vegan twist, like hearty pasta dishes and succulent burgers. The focus on simple, delicious flavours makes it an ideal choice for those who want to try vegan cuisine without being overwhelmed by unfamiliar ingredients or complex preparations. The overall experience is relaxed and inviting, with a friendly atmosphere that encourages conversation and enjoyment of the food.
Their menu offers a balance of classic comfort food and more adventurous options, so you can try something new without sacrificing familiarity.
- The Vegan Kind: Known for its innovative approach to vegan cuisine, this restaurant offers a more adventurous experience, with creative dishes that push the boundaries of plant-based cooking. They utilize unique flavour combinations and textures, allowing for a more nuanced taste of vegan culinary artistry. The ambiance is modern and stylish, with a focus on presentation and atmosphere. The experience is vibrant and engaging, offering a chance to appreciate the artistry and innovation in vegan food.
Their commitment to sustainability and ethical sourcing adds another layer of appeal for environmentally conscious diners.
- Wild: This restaurant stands out with its focus on fresh, seasonal ingredients, often sourced locally. Their menu emphasizes vibrant flavours and textures, drawing inspiration from diverse culinary traditions. The experience is one of freshness and discovery, with an emphasis on the natural taste of ingredients. They offer a wide variety of dishes, from hearty soups to flavourful salads, allowing for a comprehensive introduction to vegan cuisine.
The restaurant’s design reflects a commitment to sustainability and local sourcing, creating an inviting and environmentally conscious dining environment.
- V-Eats: This restaurant provides a highly accessible and affordable option for vegan dining. Their menu emphasizes classic comfort foods, offering familiar favourites like sandwiches, pizzas, and salads, but with a vegan twist. The experience is relaxed and casual, ideal for a quick and easy meal. Their straightforward approach to vegan food makes it a good choice for people seeking a simple and satisfying meal without breaking the bank.
The focus on affordability and accessibility ensures a positive and uncomplicated experience for all visitors.
- The Plant Cafe: For those seeking a casual and quick vegan meal, this cafe offers a selection of delicious sandwiches, wraps, and salads. The experience is quick and easy, perfect for a grab-and-go lunch or a light dinner. Their focus on convenient, satisfying meals is a great option for busy individuals or those seeking a simple and uncomplicated vegan dining experience.
The emphasis on speed and simplicity makes it an excellent choice for those looking to sample the vegan options without spending too much time in a restaurant.
Tips for Choosing a Vegan Restaurant
Navigating the vibrant vegan scene in London can be exhilarating, but knowing how to find the perfect spot for your needs can make all the difference. This guide provides practical tips for selecting a vegan restaurant that aligns with your preferences, dietary restrictions, and expectations.Choosing the right vegan restaurant in London involves more than just browsing menus. It’s about researching options that cater to your specific dietary needs and preferences, ensuring a satisfying and enjoyable dining experience.
London’s vegan scene is booming, with amazing restaurants popping up everywhere. I’m currently compiling a list of the best vegan-friendly eateries, perfect for foodies looking for delicious and ethical options. With Ireland now welcoming visitors without COVID restrictions, Ireland’s easing of travel restrictions means I’m also planning a post-trip vegan restaurant review focusing on the best spots in the city! I’m excited to explore the amazing vegan options London has to offer.
Researching Based on Dietary Needs
Understanding your dietary restrictions is crucial when choosing a vegan restaurant. If you have allergies or intolerances like gluten or nuts, thorough research is essential. Many vegan restaurants clearly indicate their ingredients and preparation methods on their websites or menus. Look for restaurants that explicitly state their gluten-free or nut-free options. Checking online reviews can also provide valuable insights into the experience of other diners with similar dietary needs.
For example, a review mentioning a specific vegan dish being free from nuts or gluten provides valuable information.
London’s vegan scene is seriously impressive, with amazing restaurants popping up everywhere. If you’re looking for a taste of something truly unique, exploring the best vegan restaurants in London is a must. Thinking about a trip to Reykjavik? For the best places to swim there, check out this guide: best places to swim reykjavik. Back to London, you’ll find incredible options for plant-based meals, and it’s a great way to discover new flavours.
Importance of Online Reviews and Ratings
Before making a reservation, scrutinize online reviews and ratings. Platforms like Google Reviews, TripAdvisor, and dedicated vegan restaurant review sites offer a wealth of information. Pay attention to consistent feedback on aspects like food quality, service, and atmosphere. Look for patterns in reviews, such as frequent mentions of specific dishes or consistent praise for the restaurant’s ambiance.
For instance, if multiple reviewers highlight the deliciousness of a particular pasta dish, it’s a strong indicator of its quality. Conversely, if many reviews complain about slow service, it might signal a need to factor that into your decision.
Making Reservations, Especially During Peak Hours
Making reservations, especially during peak hours, is highly recommended for a smooth dining experience. London’s vegan scene is booming, leading to increased demand and potentially longer wait times. Many popular vegan restaurants require reservations, particularly on weekends and evenings. Websites like OpenTable or directly contacting the restaurant via their website or phone are good ways to make reservations.
Be sure to check the restaurant’s operating hours and their policies regarding reservations for large parties. For example, some restaurants may have a minimum order value for reservations.
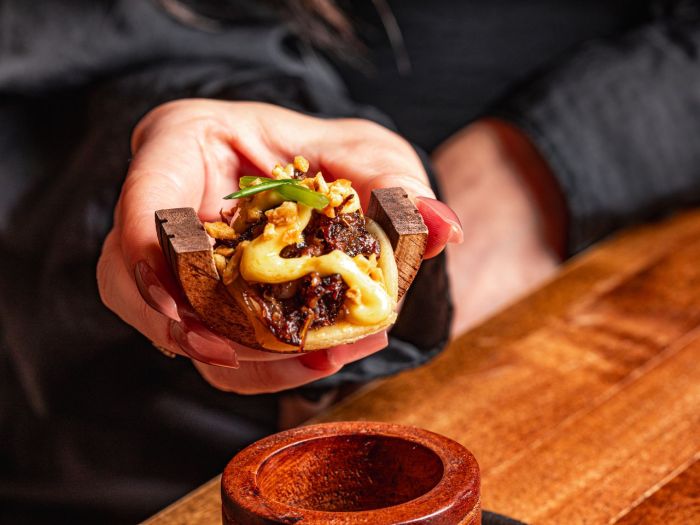
Visual Representation of Vegan Options: Best Vegan Friendly Restaurants London
Discovering vegan cuisine in London isn’t just about taste; it’s a feast for the eyes. The creativity and artistry behind vegan dishes often surpass expectations, transforming simple ingredients into visually stunning masterpieces. This exploration will highlight the captivating presentation of vegan options, emphasizing the role of fresh, seasonal ingredients in crafting memorable dining experiences.
Visual Delights in Vegan London
The visual appeal of vegan dishes plays a significant role in the overall dining experience. A well-presented dish not only tantalizes the taste buds but also elevates the atmosphere and encourages a more enjoyable meal. The use of vibrant colours, textures, and thoughtful plating techniques can significantly enhance the dining experience. Restaurant chefs frequently incorporate artistic elements to showcase the fresh ingredients and the culinary skills involved in creating the dish.
Examples of Visual Vegan Excellence
-
A vibrant bowl of roasted vegetable tagine, showcasing the rich hues of carrots, butternut squash, and sweet potatoes, sits atop a bed of fluffy couscous. The dish is garnished with toasted almonds and fresh cilantro, creating a visual symphony. The vibrant colours of the vegetables and the contrasting textures of the couscous and almonds contribute to a stunning presentation.
The fresh seasonal vegetables are a testament to the restaurant’s commitment to using high-quality ingredients.
-
A meticulously crafted vegan burger, nestled on a toasted brioche bun, is adorned with a colourful array of fresh toppings. Slices of ripe avocado, vibrant red tomatoes, crisp lettuce, and a tangy vegan dressing create a visually appealing masterpiece. The use of fresh seasonal ingredients, such as the plump tomatoes and vibrant avocado, is a key element in the dish’s visual appeal.
The presentation emphasizes the balance of textures and flavours.
- A layered vegan lasagna, showcasing layers of creamy cashew ricotta, vibrant spinach, and rich tomato sauce, is a sight to behold. The use of fresh herbs and spices adds depth and richness to the dish’s visual appeal, highlighting the depth of flavour. The layering technique creates a visually stunning effect, drawing the eye through the various components of the dish.
- A beautifully plated vegan paella, showcasing a harmonious blend of saffron-infused rice, seasonal vegetables, and plant-based chorizo. The dish is garnished with fresh parsley and a drizzle of lemon juice, adding a final touch of elegance to the visual presentation. The vibrant colours and textures of the paella make it a feast for the eyes, mirroring the delightful flavours within.
Comparing Vegan and Non-Vegan Options
London’s vibrant vegan scene offers a compelling alternative to traditional dining. This exploration delves into the similarities and differences between vegan and non-vegan options in restaurants, examining price points, availability, and how vegan establishments cater to diverse dietary needs. Understanding these aspects allows diners to make informed choices and fully appreciate the burgeoning vegan food culture in the city.
Differences in Restaurant Offerings
Vegan restaurants often feature dishes inspired by global cuisines, highlighting plant-based proteins and creative ingredient combinations. Non-vegan restaurants, while offering diverse options, may focus more on traditional preparations and meat or dairy-based components. This difference is evident in the dishes available and the ingredients used. For instance, a vegan restaurant might feature a vibrant, colourful Pad Thai using tofu and seitan, while a non-vegan counterpart might serve a similar dish but with chicken or shrimp.
Price and Availability of Vegan Alternatives
The price of vegan alternatives can vary significantly depending on the restaurant and the dish. Often, vegan versions of popular dishes are comparable in price to their non-vegan counterparts, reflecting the increasing demand for and availability of high-quality plant-based ingredients. However, some innovative, gourmet vegan dishes may be slightly more expensive due to the unique preparation methods and specialized ingredients.
Availability is generally high in vegan restaurants but can vary in non-vegan establishments, especially for complex vegan versions of traditional dishes.
Catering to Diverse Dietary Needs
Vegan restaurants often go beyond just offering plant-based options. They frequently cater to other dietary needs, including gluten-free, nut-free, and other allergies. Many establishments provide clear labels and detailed information about their ingredients, enabling individuals with specific dietary restrictions to safely choose dishes. This commitment to inclusivity is a key feature of many vegan restaurants, fostering a welcoming environment for all diners.
Comparative Table: A Popular Restaurant
| Dish | Vegan Version | Non-Vegan Version | Price Difference |
|---|---|---|---|
| Spicy Mushroom Pasta | Pasta with a rich cashew cream sauce, sautéed mushrooms, and a sprinkle of nutritional yeast | Pasta with a creamy tomato sauce, sautéed mushrooms, and parmesan cheese | £2-3 difference, slightly more expensive for vegan option due to special cashew cream sauce |
| Grilled Salmon with Roasted Vegetables | Grilled Portobello mushroom with a balsamic glaze, roasted vegetables, and a side salad | Grilled salmon with roasted vegetables and a lemon-herb sauce | £5-7 difference, generally cheaper for the non-vegan option |
| Vegan Burger | Homemade vegan burger with various toppings, served on a brioche bun | Classic beef burger with various toppings, served on a brioche bun | £2-3 difference, slight price advantage for the vegan option in some cases |
Conclusion
So, whether you’re a seasoned vegan or just curious to explore the delicious world of plant-based food, this guide provides a comprehensive overview of the best vegan friendly restaurants London has to offer. Enjoy the vibrant and delicious vegan scene! Remember to check online reviews and make reservations, especially during peak hours. Happy eating!